:: Diary - January 2017 ::
:: Tuesday, January 3, 2017 ::
After a bit of a holiday break, I plan to get the valve covers on, and the rest of the engine back together and running today.
First though, this kickdown linkage. The idea of the little U-bolts didn’t work, because the ends of the clamps aren’t long enough to tighten up, and
then get the cable linkage on and secured. So it’s plan B.
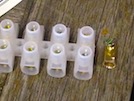 The rod linking the two cars is 4mm in diameter. A 30 amp electrical cable is slightly bigger than that. So surely, if I take a 30-amp connector, and
cut the plastic insulation off, and then cut the brass bit in half so that it only has one screw on it, that will slip over the throttle road, and
then tighten up in the right position to work the kick down, right? So I made this yesterday…
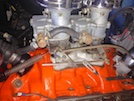 So I start by making the position of the throttle rod on both throttle linkages, and then loosening the clamps and slipping it out and putting my new
brass link over the end, and then connecting it all back up in position again. I slip the kick down cable over the screw and then adjust it so that it
just pulls the cable to full stretch when the throttle is wide open.
While I’m at it, I take off the throttle return spring and turn it around the right way.
Next, I remove the coil and clean up the bracket and the coil casing, then refit.
Then I refit the valve covers, First I stick the gaskets to the inside of the covers with a smear of silicone, and then fit the right-hand cover, and
the hand-tightened hold-down screws.
On the drivers side, I fit the cover the same way, and then discover that it’s in the way when I try to put the alternator belt back on - the alternator
hits the cover before it can move in far enough. Cover back off, then fit alternator belt and adjust up tight. Then refit the cover.
A few other sundries to fit - the crankcase ventilation valve in the right hand cover, and the vacuum hose to the servo on the left.
Finally, I reconnect the battery. I have to fit a new bolt on the positive terminal because the old one isn’t clamping, and is siezed solid. I manage
to get the old one off and fit a new one.
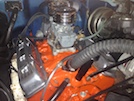
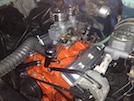 It’s not fantastic, but it looks pretty smart.
It won’t start though - it’s freezing cold and the battery has lost a bit of charge I think. Also, I think I’ve managed to flood it with all that
throttle-fiddling earlier - it starts for a few seconds and then dies, which normally means it’s flooded. There isn’t enough charge to crank it over on
full throttle to clear its tubes. So I leave it on the trickle charger and we’ll try again later!
:: Friday, January 6, 2017 ::
Still on holiday break!
I dropped in yesterday to see a car paint supplier, right next door to the shop where I bought the steel tube and plates to fix the TVR chassis - I’ve
just looked back and that was over 6 years ago… jees!
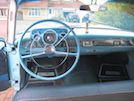 The paint isn’t for the car itself - that’s not too bad, from about 10 feet away, but not really worth painting. No, this is for the steering wheel, which
is the size of a ship’s tiller and the same colour as the dash and the rest of the car. The wheel is cracked and chipped and lets the interior down, so I
plan to refurbish it before the show season starts.
The problem is that I think that the car has been resprayed at some point in its life. The colour looks a lot like Chevrolet “Larkspur Blue” and the door
shuts, boot interior etc are all that colour. The firewall in the engine bay, though, is a much darker blue and it’s pretty obvious where it has been
masked off. So I don’t know the exact car colour code.
Anyway, the man said that if I could give him a sample about the size of a playing card, he could take spectrometer readings and make up matching paint.
That’ll do me!
So today I drop in to the barn and try the starter on a fully charged battery, and on a slightly milder day - first turn of the key, no problem! I let it
warm up a little bit, just to make sure it’s idling ok after me disconnecting and reconnecting the throttle linkage (and the coil, and the alternator, etc!).
While it’s doing that, I remove the ash tray cover - perfect size, perfect colour match.
I leave that with the man, and when I go back later, he’s found three colour matches - two of them are for Leyland Daf trucks, and the third is for a “Fleet
France” colour. He says he can’t mix the paint for me though, but the codes might help me elsewhere.
So when I get home I start searching for these colours and codes… nothing. Not a bean, old bean. The only site I find that has this code is in german,
and I’m not entirely certain whether I am ordering paint or signing a petition to invade Holland, so I do neither.
Back to square 1, it appears. I need to find a car paint supplier who can actually supply paint to match the colour - or maybe just get them to paint the
whole steering wheel after I have prepared it, that might be an idea.
The other options might be to order some paint in the Larkspur Blue colour that I think it is, and see if it matches, OR another might be to paint the
steering wheel in a contrasting colour - maybe an “ivory” to match the roof?
:: Saturday, January 7, 2017 ::
After a bit of browsing, I found a Rustoleum paint called “aqua” that looks (on an LCD screen) as though it matches my ashtray. So today I went to my
nearest B&Q (which is about 10 miles away since they shut the one at the bottom of my street, which is a pain in the arse). They don’t have the right
colour, but the wee sample on the display card also looks pretty close. I check online and there’s a Homebase a couple of miles further on, that has 4
tins in stock.
When I get there though, the lid colour doesn’t match at all.
So I decide to splash out £11 and order an aerosol can on-line, of Chevrolet code 795 Larkspur Blue - if it matches, great. If not, it’ll be getting
coloured in ivory. There, that’s settled.
:: Tuesday, January 10, 2017 ::
I made a big mistake today. Biiiiiiiiiiiig mistake.
You see, the guys that I met a couple of months ago (the ones with the hot rods) told me about a guy with a garage about 4 miles from me, who builds hot
rods and restores American cars. They told me where his place is, and I have passed several times but have never been able to find it (story of my life,
in a nutshell, right there).
Well today, I was driving past in the Range Rover, and a 50’s American truck appeared from the opposite direction and turned into a wee side lane - so I
slapped on the indicator and decided to follow it, on the probability that it was heading for the secret getaway. And it was!
What do you expect a hot rod builder to look like? Kinda older, bearded, ponytail? Yep that’s him. On the inside, though, he is Satan. He invites me in
for a chat about my car, shows me the ones he is building, and then shows me his stock of shiny parts. Polished valve covers. Stainless steel exhaust
headers. Chrome pulleys, housings and dress-up bits. And then, the piece de resistance, two air cleaners the same as the ones on mine. Both of mine are
damaged in different ways (one has a damaged thread so can’t be tightened down, the other has a damaged mount so is held down by a non-standard screw).
These ones are brand new, for about the same price as you pay for replacement paper filters (if you can get them). So… I buy two.
He imports parts by the crate from the US, so I ask him to get me a couple of hood springs - but I’ll be up when the crate that’s currently in transit
arrives, to see what else he has.
I can see this getting very expensive, despite my original decision not to get too far into “doing it up” beyond a bit of basic cleaning and tidying.
Nice guy, but what a bastard.
:: Wednesday, January 11, 2017 ::
It’s winter! It’s windy and it’s freezing. I’ve been up half the night listening to the wind blowing outside - well, not so much the wind, but it’s
bin-day today so, between the crash of wheelie bins being blown over, and then disgorging their contents of plastic bottles and aluminium cans to
rattle and clatter along the length of the street, I’ve had very little sleep.
This has led me to two observations though:
1. It seems to be windy on nearly every other Wednesday - that is, the Wednesdays when the “recyclable” bins go out. Those are big, but light (they
only have paper, plastic and aluminium cans in them) so they blow over easily, and the street is therefore regularly filled with crap.
2. This propensity for huge light bins being blown away isn’t helped by the habits of most of my neighbours, who appear to specifically set their bins
cross-wind, so that they expose the maximum possible area to the wind direction (and the least resistance to turning over). Is it the engineer in me? I
always align the bin so that its arse faces into the wind - this means that the wind has to lift it off its wheels if it’s going to overturn. It also
means that the wind blows the lid SHUT not open - so the lid doesn’t act like a sail, AND stuff doesn’t get sucked out even if the bin doesn’t fall over.
Anyway, after a night listening to crashing bins, rattling cans and rustling plastic, plus the wind itself against the house, the street looks this
morning like the aftermath of a drunken origami festival. Only one bin is still closed and full…
Anyway - I decide to have a trip along to the Chevrolet in the farm, where the barn faces away from the wind, and is therefore likely to offer some shelter.
I regret it almost as soon as I arrive though, because it’s bloody freezing.
I remove the air filters and housings and install the new ones I bought yesterday. No point in a photo because they look exactly the same, but now they
are properly fixed in place.
Next, I faff around with a couple of other things that I can’t remember now, before I decide to see if I can remove the steering wheel.
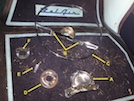 I didn’t take photos as I took it apart, but here’s all the bits laid out in the footwell.
I start by removing two short screws that go from the back of the steering wheel, through the spokes (backwards towards the driver) into two threaded
holes (C) in the horn ring (Part B). That lets me remove the horn centre badge (A).
Then I remove three longer screws and remove the horn rings (D) - there’s a flex-plate that goes against the wheel centre, then the horn ring and then
a clear plastic insulator that the screws go through.
With that removed, I take out the horn contact and spring, and its insulated tube (E).
The next step is removing the steering wheel. Apparently, for this, you need a special puller to detach it from the splines and taper. I haven’t got
one, but I’ve brought a few bits of bar and bolts etc in case I need to botch one up. But let’s try another way first…
I loosen the centre nut, but leave it on the last couple of threads. This is very important if you don’t want to end up smashing your own face in. Again.
Then I set the wheel to “straight ahead” and then brace my knees under the wheel, pulling it backwards at 4 o’clock and 8 o’clock. Then with my hands at
10-to-2 (as per the driving instructor’s manual!) I haul backwards as hard as I can, alternating slightly left to right. The wheel pops off in about 5
seconds, no special tools required.
This is the point where, if you had taken the centre nut right off, you would be spitting out bits of teeth and stemming the blood flow from your nose
with bits of dust sheet. As it is, all we have to do is unwind the nut the last 2 turns and remove the wheel.
On the back of the wheel (the column side) there’s another plate (F) that gives the horn contact, and also works the self-cancel for the indicators,
held on by another 3 screws.
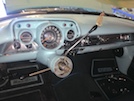 So that leaves us with this.
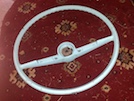 and this.
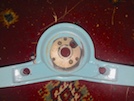 There are some serious cracks around the steering wheel hub.
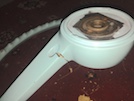 mostly hidden by the horn ring, from the front, but still bad.
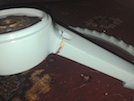
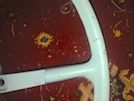 And around the rim where the spokes join.
The wheel has a steel frame covered in plastic, so as long as the steel is in one piece, there’s no problem, the damage is just cosmetic. But I need to
repair it before I forget how it all goes back together…
But it’s too cold today to do any more of this - I’ll take the wheel back to the house and my own garage (which isn’t heated either but at least I can
work in short bursts).
:: Thursday, January 12, 2017 ::
It’s still winter! It has been snowing, it’s still windy and it’s sub-zero out there. The furthest I am going is the garage (maybe). That’s up until
the point when my daughter phones me from her house about 3 miles away - she’s started her car, gone around defrosting the windows and the car has
re-locked itself with her on the outside, her phone on the inside and the engine still running. She’s had to borrow her partner’s phone to call. See,
it’s hereditary…
My suggestion of using a nearby half-brick to open a window doesn’t go down well, so after a phone-guided rummage through most of her old room, I find
a spare key, and go up with it. Does anybody know how to stop a 2010 Fiesta from deciding to lock you out at random?
While I have the phone fired up searching for the answer to this, it reminds me that “on this day in 2014 you were smoke-testing a TVR”. For new readers,
I had to test the TVR’s inlet manifold and system for air leaks, so I built a smoke tester out of a box of matches, a bit of hose and a biscuit tin. It
worked too! I was a genius once (yes, just the once).
This inspires and invigorates me to ignore the shite weather, and make a start to restoring the Chevy’s steering wheel.
The first step is to get rid of these cracks. Now you could just rub them down and smear some filler in, but you really need to get a good bond so that
it doesn’t crack and fall out as the plastic wheel flexes, or even expands and contracts with heat when the sun shines through the windscreen. Although
it’s hard to imagine Scotland with any sunshine - have you heard the famous song that goes:
Oh by Tummel and Loch Rannoch and Lochaber I will go
but to me the situation is a farce,
because the calendar states clearly it’s the middle of July,
and yet here I am with snow up to my arse.
Indeed. Nevertheless, better make some attempt at repairing the steering wheel properly. This involves opening up each crack, and filling it with epoxy -
that sticks to the plastic like shit to a blanket, and also allows the plastic to flex without cracking. Ordinary body filler doesn’t stick so well, but
more importantly, doesn’t expand and contract the same as plastic, so is bound to crack.
So I start with a Dremel thingy with a tiny grinder point in, and start to follow each crack and open it up to a fee profile. I start at the centre, in
the bit that’s normally covered by the horn ring (which hopefully will cover any beginner mistakes!).
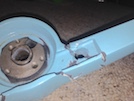 I know that the wheel is made of black plastic (I was pricing new ones) but mine seems to have a few white bits mixed in, as you grind the crack open.
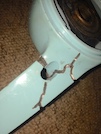 Some of the cracks take a fair bit of opening up to get to a base that isn’t as crumbly as a Cadbury’s flake (remember them? Every boy our age does, for
some reason).
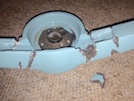 Then a whole chunk drops off when two cracks join up… This is a pain in the botty, but not as much as it would be if it fell out after you’ve repaired
and painted everything. Stay positive!
At this point it dawns on me - the white bits are areas of filler where the wheel has been repaired and painted before!
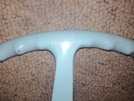 By way of illustration, here’s some innocuous-looking cracks on the rim.
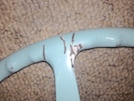 After a bit of grinding, you can see that those cracks follow the edge of the white filler, which is obviously separating from the wheel, enough to crack
the paint.
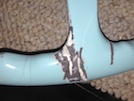 With a bit more paint removed, you can see the two lines of filler exactly where those cracks were. At this point, I decide to “shit or bust” and remove
as much white filler as I can find, so that it doesn’t crack in future and ruin the fantastic job I am about to do (still staying positive, see?)
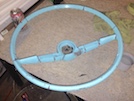 So after a bit (well, a lot) more dremelling, I have opened up most of the cracks back to the original black plastic.
 The next step is to sand the whole wheel down and fill all those cracks, but first, I mix a small bit of epoxy (JB Weld if you must know) and stick the
missing chunk back in place. I’ll leave that until at least tomorrow to set, and then I’ll get on to sanding and filling.
In the middle of all that, I had to go back into the house to fill a wee dish with some water - it stops the epoxy sticking to your fingers and helps
you smooth it. While I was in, I realised that I also needed a pee, but didn’t want to lift the loo seat with manky hands. “How handy would it be if it
worked like a pedal bin?” I thought - you just stamp on the pedal, pee, then seat comes back down, maybe with a damper to prevent it clattering. I like
that idea but then I thought “what if a female is sitting and accidentally stands on the pedal and gets launched backwards out the window?” Then I thought
“serves her right for moaning about something as inconsequential as the seat being left up” - so I think I might do it!
See, the spark of genius is still there. It’s more like a glowing ember, right enough, but it’s something!
:: Friday, January 13, 2017 ::
No inspirational quotes to start the day, so it’s straight into the steering wheel refurbishment again.
First, I sand down around all the cracks, just to get the paint off the areas for repair. For this, I mostly use one of those oscillating multi-tool
thingies with a sanding pad the shape of an iron (if you don’t know what shape that is, ask your mum - she’ll now), plus a bit of hand-sanding on the
tricky bits. Then I blow out all the dust with an airline, ready for filling.
As I said the other day, I’m not using ordinary car filler - it’s not flexible enough. What I’m going to use is an epoxy putty - you buy a stick of
two-part putty, cut a bit off and mix it together with your fingers, and then stick it to everything in sight before it “goes off”.
I discover with the first batch that the “going-off” time is only 3 or 4 minutes, so the rick is to cut and mix little bits as you use them - making
sure to keep the “stock” that you’re cutting bits from, wrapped in cling film too stop that going hard too.
Nevertheless, I work my way around the wheel pressing the putty into the cracks, starting at the hub and the difficult mouldings around the horn ring.
A wee bit of water on your fingers helps to smooth the putty into place without it lifting as it sticks to your fingers.
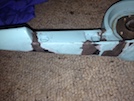 The important thing is to get enough putty on to fill the cracks, without leaving a depression that you have to fill again later. You also don’t want
to leave too much of a bump that you have to spend 3 hours sanding off later.
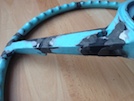 This is the back of the area where the chunk fell out yesterday. It all seems firmly re-attached now!.
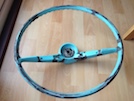 So that leaves me with this. Yes, that’s the kitchen floor - one of the few advantages of living on my own is that I can do stuff like this in a nice
warm kitchen, instead of out in the garage (provided that I get it all cleaned up before my daughter gets in, she’s the Genghis Khan of OCD cleaning -
where’s that idea for the pedal-operated bog seat again?).
So now I need to leave that until it hardens - the card says 5 hours but that coincides with “home time” for my wee darling (and more importantly, dinner
time) so I’ll leave it until tomorrow before I sand everything back to shape.
This had better all be worth it…
:: Saturday, January 14, 2017 ::
Good job I’m not paying for my time - I’ve spent hours on this now, between 2 hours grinding out cracks, 3 hours yesterday filling, and another 3
hours today sanding.
I use the multitool and 80 grit paper to shape all the bits I filled, back to the original steering wheel shape. The tool can’t do the areas where
the spokes join the rim, and I had to shape those by hand. I also had to shape the back of the wheel by hand, because it has “nobbles” or finger-grips,
and all of the cracks are in “valleys” so they also have to be shaped by hand.
Then I have to shape the cut-outs in the front of the spokes, that the horn ring will fit into. This involves smoothing the inside of the “ribs” and
then running a small grinder through the two mounting holes, to smooth them put and make sure the horn mounting screws will go through later!.
As I say, 3 bleeding hours of this, and I have it back to the right shape.
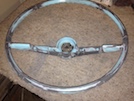 So now it looks like this. You’ll see I’m back in the garage, not the kitchen - sanding with electric tools produces lots of dust!
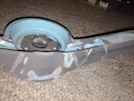 This is again the area where the chunk fell out - you can see the v-shape that was stuck back in.
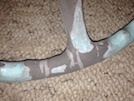 And this is one of the joins between the rim and the spokes, showing the same area as the 3 photos on Thursday.
So that’s all of the shaping done. Now I need to rub it all down with a finer sandpaper, and then wet and dry, to get it ready for painting.
:: Sunday, January 15, 2017 ::
Another couple of hours today with a finer grade of paper (180 grit). I smooth off the whole wheel and the spokes and the hub by hand - the multi-tool
is maybe just a wee bit to harsh for this stage. Most of that time, though, is spent smoothing between each of the finger grips on the back of the wheel.
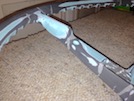 That gets me to here. This is the front of the left-hand spoke showing the recess for the horn ring.
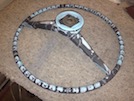 Here’s the back of the wheel as I was working on the finger nobbles.
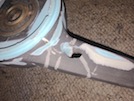 And this is the back of that left-hand spoke - you can see that there are still sanding marks when you look close up - I ned to go over it with a fine paper.
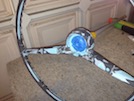 I need to think about how I’m going to paint it. I find a paint roller extension pole, which fits into the centre hole. I’ll put that through an upturned
pot or something to hold it upright so that I can get all around it to spray it evenly. Then I mask off the metal horn contact rings in the centre, front
and back. If you paint over those, the horn doesn’t work!
I wipe the whole wheel down to get the last of the dust off - and then I notice a tiny depression on the back of the right hand spoke. It’s about 5mm long
and maybe 1mm deep. Nobody is going to see it unless they have their head in the footwell, but I know it’s there… I mix up a little more of the epoxy glue
I used on Thursday, and spread it into the mark. I’ll have to leave that to dry then sand it down again - then give the whole wheel a fine sand to remove
the sanding marks.
:: Tuesday, January 17, 2017 ::
No update yesterday, but I sanded the whole wheel down with a finer sandpaper, so that it’s as smooth as a baby’s wossname. Then I blew off all the dust
with an airline, and finally got the rubber gloves on, mounted it on my handle thing, and wiped the whole wheel down with panel wipe.
Once that had evaporated away (it only takes seconds, rattling the paint tin takes longer) I spray it all with plastic bumper primer.
Once this has dried over a few hours, I can see a few small pinholes, so I fill those with knifing stopper, and leave that to dry.
So that brings us to today - I start by rubbing down the 5 bits of knifing stopper, and then gently rub down the whole wheel again. Then another panel
wipe and I spray paint the wheel again.
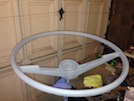 One sprayed steering wheel! It’s not perfect, but it’s not bad, and a lot better than it was.
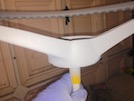 Here’s the bit that where I had to replace a whole chunk (right hand spoke).
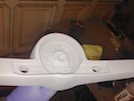 And here’s the centre recess for the horn button - this is all hidden when the horn button and ring are all in place.
 All of this is carried out in my tidy, sterile dust-free environment. To be fair, the actual spraying takes place in the centre of the garage after I
have moved the Porsche out into the drive, so none of that stuff gets over-sprayed. But as you can see, there’s no safety hazards here, no siree bob.
Do I look like I give a fuck? (I might, if I trip over an airline and land my sorry arse on an electric sander, but otherwise - naw.)
I give it another coat of primer after a few hours, so now it’s ready for the colour coat (and hopefully that will match the rest of the interior!)
:: Wednesday, January 18, 2017 ::
It’s the big moment! Colour coat!
It’s a little bit windier that yesterday so I move the Porsche out of the garage into the drive, and then go inside and shut the door. Then it’s a simple
matter of a quick panel wipe and gently spray on the first colour coat.
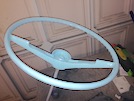 Even with just the first coat, it looks not too bad at all!
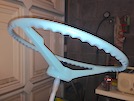 Not too shabby at all..
I leave it for a couple of hours while I nip into the house to do some work, then come back out and spray on the second coat. Now, I want to leave that
to dry before I put the Porsche back in (partly to let any overspray settle out of the air, and partly so that the Porsche doesn’t kick up a cloud of
dust that settles on the paint). But I need to nip down to the shops and I don’t want to leave the Porsche in the drive either… This dilemma is only
solvable by going to the shops in the Porsche. That’s my excuse…
2 hours later I get back home, the second coat has dried nicely but I decide to give it a third coat just to get maximum evenness.
I’m really quite happy with it - after a bit of a gentle rub down and polish, it will be great.
The only uncertainty now is - does it match the rest of the interior? It’s hard to say, because it looks about 10 different colours depending on how the
light hits it (see the variations in colour in all of the previous photos).
We’ll find out in a couple of days when I fit it back on the car!
:: Friday, January 20, 2017 ::
Had to work all day yesterday. I’m not used to this pressure! At least it gives the paint a chance to dry our properly - I’ve had the wheel in the house
to help it dry.
So today, I take the wheel out to the garage and give it a bit of a rub down with rubbing compound - just to put a nice shine on it.
Then I load up the “van” with a selection of tools, and head along to the farm.
First bit is to fix the indicator-cancelling plate onto the back of the wheel. Then the wheel goes back on the column where I marked it, then a quick check
to make sure it’s all in the right place before I tighten it down.
Now the fiddly bit - fitting the horn mechanism. First I disconnect the battery so that I don’t have the horn blaring as I try to fiddle all the bits into
place. First there’s a sprung contact and insulator that goes right through the wheel (the big hole you can see in the earlier pics) then there’s a horn
contact ring and a loose metal spacer, with a plastic spacer on top of that.
Then there’s another plastic insulator that goes through the horn button, and three screws that go right through the whole lot, into the steering wheel.
Trying to get all of that aligned isn’t easy - you need three octupuseseseseses holding all of the various bits in place while you locate the screws.
Eventually, I get it all located and all three screws in the holes. A quick check to make sure all the insulators are in place (reconnect the battery and
see if the horn goes off!) then with the battery still connected, I tighten the three screws down as far as they will go, without sounding the horn. A
quick check confirms that the horn works if you tap the ring anywhere around its edge. Then refit the central trim and badge.
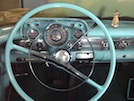 And there we go! It’s hard to tell in the garage, but it seems to match perfectly.
I don’t know how long it will last - trying to stick crumbly 60-year-old plastic together is like trying to fill the cracks in a fruit scone - but it
certainly looks a lot better than it was! What else was I going to do with my time?
 The rod linking the two cars is 4mm in diameter. A 30 amp electrical cable is slightly bigger than that. So surely, if I take a 30-amp connector, and
cut the plastic insulation off, and then cut the brass bit in half so that it only has one screw on it, that will slip over the throttle road, and
then tighten up in the right position to work the kick down, right? So I made this yesterday…
 So I start by making the position of the throttle rod on both throttle linkages, and then loosening the clamps and slipping it out and putting my new
brass link over the end, and then connecting it all back up in position again. I slip the kick down cable over the screw and then adjust it so that it
just pulls the cable to full stretch when the throttle is wide open.

 It’s not fantastic, but it looks pretty smart.


