:: Diary - June 2017 ::
:: Thursday, June 1, 2017 ::
The windscreen wiper kit arrived on Tuesday, having taken 5 days to get from San Francisco to London, and then 7 days to get from London to here. Good
old Porcel Farce.
Anyway, I opened the box and found a million bits of meccanno, an electric motor and 6 pages of typed instructions and hand-drawn diagrams. You know
that feeling when you walk into an exam that you forgot to revise for? That’s me, that is…
But I work my way through, step-by-step, to assemble the whole kit on the bench, so that I understand how it goes together.
 Here’s the whole kit. It has a frame that bolts into the original mounting points on the car, with a new motor etc.
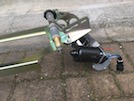 This is the motor end - the motor sits above the driver’s feet, and you can see the spindle for the wipers (the brass bit) pointing forwards.
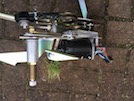 Another view of the new motor etc, showing how it mounts on the frame. .
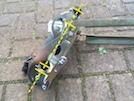 It’s important to get the motor centre, the rotating arm, the operating arm, and the transfer link to the other side, all in line like this when the
motor is “parked” - you don’t want any of the arms going “over-centre” which just means the whole thing chews itself to scrap.
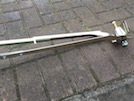 Here’s the other side, showing the “slave” spindle on the passenger side.
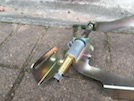 This is it, looking from the scuttle side - again, the wiper goes on the end of the brass spindle.
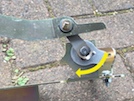 And this is the same part from behind (as if you were looking up from under the dash) - At this point I notice that the grey metal bit needs to be
rotated so that the lug is locked in that slot - the instructions don’t mention this, but again it’s important to prevent over-centring - if that
happens here, the passenger wiper turns upside down and starts burrowing its way through the bonnet.
So now that I see how it all fits together, I need to take it apart into sections that I can fit up behind the dash, and fix back together upside-down
with limited access. Then I need to work out how to get the old wiper motor, mechanism and cables out of the car. Not just now though, because I need
the car for Sunday for the Sporting Bears, so I’ll just have to hope it doesn’t rain too hard.
:: Sunday, June 4, 2017 ::
Today is one of the Sporting Bears big events - Dream Rides at the annual show by Borders Vintage Automobile Club at Thirlestane Castle in the Scottish
Borders. It’s the Chevy’s first time - how will it get on?
 Other cars on the Sporting Bears stand include a McLaren, an Ultima, a Noble, two TVRs (it would have been 3 but the Cerbera had to pull out at the last
minute - how familiar does that sound?), a Dodge Viper, two Lambos, a Westfield, a Jag F-Type, a Delta Integrale, a Jag SS,
a Marcos Mantula, a Morgan, a Sierra RS Cosworth, a Karmann Beetle, an Alfa 4C Competition, and an AC Cobra.

 The Chevy looks fantastic in the sun - sometimes I can’t believe it’s mine!


 First, the Driver’s briefing - “Screw the nut, nae actin’ like an erse, nae speedin’, nae crashin’, dae whit yer telt drivin’ aboot the show". Pretty simple
really.
 The local newspaper has been running a competition to win a VIP tour of the show and the castle, including a Dream Ride of their choice, lunch, etc. They
have picked my car! They have a presentation and then some photos for the paper, in front of the castle.
 I’ve also been selected to do a TV interview for the local channel. The presenter is Fiona Armstrong, who older readers might remember as a national ITN
newsreader and also on GMTV in 1993-ish.
Then it’s on to the Dream Rides proper - I do 7 over the day, lots of people interested in my old car.
 I do get a 45-minute break to grab a hot dog and have a wander around the show. There’s 1,100 cars here though, so there’s no chance of getting round
everything. This Dodge Charger is nice though…
 … and so is the 1952 Pontiac Chieftan.
There’s been a bit of rain, on and off, during the afternoon, but all in all, a fantastic day out. The Chevy has been very popular, not only for Dream
Rides, but just people coming up to see it.
:: Saturday, June 10, 2017 ::
I have promised to take part in a gala day in Jim’s village. Apparently, I am to drive the gala queen and her entourage (all primary school kids) along
in the parade, behind a procession of floats led by a pipe band. Sounds easy.
At the start of the procession, the 3 kids pile in the back, with a photographer in the front. The procession gets going, I am right behind the band,
the other floats are behind. We crawl, at a very slow walking speed, along the Main Street, which, I have just noticed, is slightly uphill the whole
way, not quite flat. People are waving and cheering, it’s great.
Except that the temperature gauge is climbing. And climbing. And climbing.
So does the road, for the last 100 yards or so. The car starts to misfire, then it stops. Dead. It won’t start again, and the battery is flat after
3 tries. I get a push to the side of the road, and the rest of the procession comes past.
While they are getting organised to all march back, I cadge a jump start from the people in the house where I have stopped. The procession marches off,
we faff about to re-start the car, and I catch up to the procession just as it reaches the park where the events are to take place. I park on the road
(where the AA can reach me easily).
The car is fine for the rest of the day, as long as it’s moving and there is air flowing through the radiator.
When it’s stationary, or going slow, the temperature rises, which thins the oil, which is then more easily sucked up to foul the plugs.
I need an auxiliary electric cooling fan.
:: Friday, June 16, 2017 ::
I measure the radiator - it’s 16 inches high. After a bit of research, I order a 16-inch electric fan that you can change to “pull” air through if
it’s mounted behind the radiator, or “push’ if you mount it in front. I also order an adjustable thermostatic switch.
I’ll wait for that to be delivered while I’m away on a TVR weekend.
:: Friday, June 23, 2017 ::
The fan is here, so I nip out to buy some wiring and a fused relay.
Then I make start to the wiring. I work out where I am going to fit the relay and the thermo switch, and how I am going to route the wiring from the
ignition supply, and from the battery supply. I mount those to the bulkhead beside the radiator.
Then I start with the ignition supply - a new green wire through an existing grommet in the firewall, and then route it behind the dash avoiding the wiper
and steering mechanisms, to the fusebox in the drivers footwell. The other end follows the existing loom to the new relay. I connect it to the relay but
not to the ignition supply yet.
This is where I discover that the starter doesn’t work any more. I’ve obviously knocked a wire off somewhere… The good thing is that, unlike a TVR, you
can lie on the floor, and also, there’s more room up behind the dash. The wiring at the ignition switch is still ok.
I find a loose wire hanging down, with a ring connector on the end. I can’t see any screws that it can reach or connect to though. After HOURS of poring
over wiring diagrams etc, I deduce that this wire isn’t original (and neither is quite a lot of the rest of the wiring up there). Eventually, it transpires
that it’s part of a rudimentary immobiliser system, and that this little round connector actually pushes into a female spade connector that’s wound in
insulating tape. With that re-connected, we have the car working again.
Unfortunately, it’s too late now to finish fitting the fan.
:: Tuesday, June 27, 2017 ::
Back to fitting the fan. First I fit the fan to the radiator. I am keeping the mechanical fan on the water pump pulley, so the fan goes on the front of
the radiator. First I have to take the blades off and turn them over, then reverse the motor connections. The fan is mounted with “tie-wrap” like plastic
strips through the radiator fins, with rubber pads to protect the fins.
With the fan in place, I install the thermo switch. The thermo sensor is on a thin capillary tube, so I pull off the top hose, and insert the sensor (into
the hose, not the radiator), and replace the hose.
Then I wire up the relay to the thermo switch - pretty simple really. The relay has an ignition supply to the solenoid. That is earthed through the thermo
switch - so when the engine reaches the temperature you’ve set, the relay energises. There’s a wire with an in-line fuse at the battery, to the “supply”
side of the relay - that then goes to the fan and then to earth.
Right - wind the thermo switch up to around 90 degrees, and then turn it backwards slowly with a meter across the terminals, until it clicks - at around
2- degrees (which is the ambient temperature). Then start the engine, and turn it up to around 90 degrees, and watch the temp gauge. When the gauge
reaches its normal running temperature, turn the knob down till it clicks on - at around 82 degrees.
I leave it running for ages, the fan kicks in and out, but the gauge temperature never rises above normal. Lovely!
 Here’s the whole kit. It has a frame that bolts into the original mounting points on the car, with a new motor etc.
 This is the motor end - the motor sits above the driver’s feet, and you can see the spindle for the wipers (the brass bit) pointing forwards.
 Another view of the new motor etc, showing how it mounts on the frame. .
 It’s important to get the motor centre, the rotating arm, the operating arm, and the transfer link to the other side, all in line like this when the
motor is “parked” - you don’t want any of the arms going “over-centre” which just means the whole thing chews itself to scrap.
 Here’s the other side, showing the “slave” spindle on the passenger side.
 This is it, looking from the scuttle side - again, the wiper goes on the end of the brass spindle.
 And this is the same part from behind (as if you were looking up from under the dash) - At this point I notice that the grey metal bit needs to be
rotated so that the lug is locked in that slot - the instructions don’t mention this, but again it’s important to prevent over-centring - if that
happens here, the passenger wiper turns upside down and starts burrowing its way through the bonnet.


