:: Diary - January 2022 ::
:: Saturday, 1 January, 2022 ::
Well, dear readers, what a year last year has been… unforgettable because of the unexpected passing of my son in May - a life-changing
experience for the rest of our family, and for hundreds of his friends and colleagues.
However, life for the rest of us must go on, and on a happier note, I got married again, one of my grandsons started school, and the
younger one started walking!
Back to cars, though, and we have to say that not a lot has happened, largely due to the pandemic and the lack of car shows. We have
had a couple of runs out though, when restrictions weren’t so bad, just to remind us what we’re missing.
And so we start a New Year. As regular readers will know, I have a garage at the house, and I rent half a barn at a farm near here. That
means that the Porsche and TVR are garaged, while the poor old Chevrolet has to sit outside, which isn’t doing it any good at all. It
leaks in water, which is soaking the inside, and the outside paintwork is now pretty crap.
The farm has just been sold (well the sale is just going through) and the new owner wants to charge a bit more. The guy who rents the
other half of my barn has moved out, so I have been offered the whole barn if I want it, at a price that’s not too silly. I’ll be able
to get the Chevy in there, so that should keep it dry at least. It just fits through the door though, and has to go in straight (not
at an angle like the two sports cars), so it only just fits alongside whatever other car is already there.
Let’s look forward to a few more events this year!
The lesson is that life is all too short, so no more “maybe one day”… the time is now.
:: Thursday, 13 January, 2022 ::
The sale of the farm hasn't gone through yet - the lawyers keep asking "one more question" as they do, so we are no past the proposed moving
date.
I spoke to the new and existing owners over the holidays, and asked if I could stick the Chevy in there already - the windscreen seal is
leaking again so it's getting wet inside (just carpets and headlining luckily) and the rain, wind and frost isn't doing the California paint
job any good! I've had to wait for a day when the roads aren't wet, and when there's no salt on them either. This week has been a lot better
so I decide to take it along this morning.
 Thing is, it only just fits through the door, and you can't really put it in at an angle...
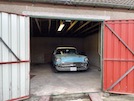 So it ends up more or less in the centre of the garage, where you can't get the other car in or out past it. In fact, you can't get between
the two cars at all - I tried that last time, a few years ago.
So I've been out and bought some of them Go-Jak things - you put them under each wheel, pump the pedal so it lifts the car, then you can move
it around like it's on castors (that's because it IS on castors!)
However, there are castors and there are castors. I bought those cheaper tyre dolly things last time, the ones where you have to jack each
wheel onto the dolly, but I couldn't move the car once it was lifted. Those castors have an axle bush but no bearings, so the weight of the
car (especially this thing) just makes them seize up.
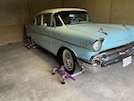 So first I lift the car onto the wheel jacks...
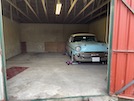 These new ones have bigger, harder wheels, and ball bearings... so it's pretty easy to push it over to one side of the garage.
That lets me get the TVR back in place as before.
 Then I position the Chevy far enough from the wall so that I can open all the doors (to let it dry out) and disconnect the battery because
the interior light won't go off. There's probably a switch somewhere but I couldn't find it. Connect up a trickle charger and take the
jacks out so that they don't distort the tyres, and it's sorted!
Now I can plan tidying up the paintwork (as best as I can without a full respray yet). I also need to figure out why the engine was
running like a tractor on the way here - dropped plug lead possibly or condensation in the distributor? Oh and the rear drivers side
brake is grabbing so that needs to be taken apart and cleaned up. Oh and I'll have to try to seal that windscreen, hopefully without
taking it out.
That's enough for starters!
:: Saturday, 22 January, 2022 ::
The best laid plans... The idea was to start tidying the car up this week. That was until I got up on Sunday morning, and promptly fell
over again when my heel touched the floor. Achilles tendonitis apparently, which means sitting still, hopping to the loo and no driving.
By yesterday, it had reduced to "a bit of a limp" so I decided to load a dehumidifier in the car and go and have a look at what's needed.
First, I started up the TVR and manoeuvred it over a bit, closer to the wall. Then I jacked up the Chevy and moved it sideways and forward,
closer to the door where I will get more light.
Next, the water leaks. The carpet was still soaking so I set up the dehumidifier in the passenger footwell and shut all the doors and windows.
The sun visors are only reinforced cardboard, and they are wet and rotten. I'll be replacing those in any case, so I removed them - 3
screws each side.
Last for yesterday, I fitted one of those battery isolator thingies to the battery post. I've had t lying in my electrical box for around
30 years, but it didn't fit the car I had then and I never got my money back! I just KNEW it would come in handy one day!
Today, the dehumidifier is half-full and the carpets are half-dry, so that's an improvement!
So - where is that water leaking in? Well, at least some of it is coming around the windscreen. I've noticed drips onto the middle dashboard
(just to the left of centre) so I suspect the top seal (at least).
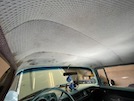 This initial diagnosis is supported by the observation that the headlining is wet and mouldy, and rusting round the edges!
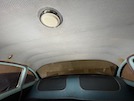 The back isn't so bad but is also obviously suffering from a damp atmosphere.
Now then... to get to that top rubber on the outside, you have to take the whole windscreen out. The top chrome strip is fitted to the
rubber before it's fitted to the car... The chances of getting the screen out without cracking it, are virtually zero. The chances of
getting a new screen delivered without it being broken in transit, are even lower than that. So I'm going to try sealing it on the inside.
To do that, I have to remove the painted garnish trims around the inside of the screen. It's held in with cross-headed screws so that should
be easy. Except that they have all been soaked in water so are rusty, so not so easy... some of these screws take ages, with the help of
a wee drift to shock them loose, an impact driver and lot of bad words my mum wouldn't like.
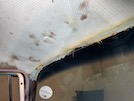 After what feels like hours of work, the four bits of trims are all off intact, along with the interior mirror, with no broken screws. Now
we can see where the headlining is stapled along the top edge of the screen. We can also see how much the headliner has faded! What you
can't see is how damp all of this is...
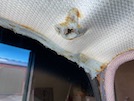 and here's the other side...
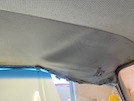 which is rotten and falling apart.
I've noticed the fading and the mould and the rust marks over the years, but I haven't bothered to fix it while the car was parked outside
- it's a lot of money and effort for it only to reappear a couple of years down the line. I looked last night at replacement sun visors,
but they are going to stick out like sore thumbs against a mouldy faded roof. You can get new headliners, from America, and they're not TOO
expensive - but they are a nightmare to fit! Fuck it, how else am I supposed to spend my time?
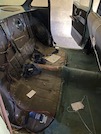 The next step, then, is to remove the trims around the rear quarter window. Those are held in with 4 screws each side. one of them covered
by the rear seat back, so I remove the rear seat first and prop it against the wall to air.
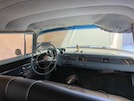 So this is it, the point of no return! Removing this rotten headlining is going to pull it to bits around the edges (it's tucked into spiky
strips along the tops of the doors), and it won't ever go back in. I need pause here to take some brave pills and put on the big boy pants,
and also to be certain that I can definitely order a new headliner!
I also want to reseal the bottom edge of the screen around the outside, so I need to remove those outer trims. I'm also planning to properly
repaint the valance, so those trims would have to come off for that anyway.
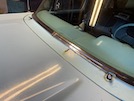 First I remove the wiper arms. That takes about 5 seconds to say, but a lot longer to do, with a wooden block, wee levers and more
non-mum-approved language. Then I unscrew and remove the escutcheons.
There's a wee joining strip in the centre of the trim, that levers off. Under that there's a screw holding a clip to the body - that comes
out ok after some impact-loosening.
The next step is to remove two wee nuts near the outside corners, up under the dash. I don't have the right size of spanner or socket, so
I have to stop here for today.
All of that has taken me two hours, with nothing terminally broken! The ankle is sore and it's getting near dinner time!
I tidy out all my stuff and put the dehumidifier back in.
When I get home, I have a hunt for headliners and sun visors. This is when I discover that headliners for 2-door and 4-door hardtops are
pretty easy to find, but 4 door sedans are a wee bit more difficult. Eventually I find a nice blue set that looks like mine when I got it,
so I get that ordered - 4 or 5 weeks manufacturing time!
This should be an "interesting" learning experience!
:: Sunday, 23 January, 2022 ::
Right - today we're going to get this headlining out of the car. Yes we are. No, really.
First, let's remove the dome light (interior light to us Brits). I can't see how it comes off, but apparently if you pull hard enough it will
either come off, or shatter. Fortunately, the chrome ring and lens come off together. That leaves the light itself, mounted to the roof by 3
wee tangs that go through slots and then twist. Untwist with pliers, light comes off. Unfortunately, there is no convenient wire connector and
the bulb holder doesn't seem to come out of the unit. It'll have to dangle for now...
Then I unscrew the coat hooks above the rear doors. Easy bit!
Right, big breath and... I take hold of the front of the headliner above the windscreen and pull it out of the staples. Then I start to pull / tear
it out of both sides, above the door, back to the first metal bow. The bow goes into a hole at each end - there are 2 holes so you have to
check whether it is in the top or bottom hole. Each bow is different and will only go back properly exactly as it came out. Many notes required!
I pull the bow out of its sewn-in tube, noting which end is which. Then I mark it on a bit of masking tape.
Repeat for the second bow above the front seat...
Next, you have to start at the back. You'll see why in a minute. The back of the headliner is fixed to a length pf card above the back window.
That folds back ver itself and tucks into tangs in the roof. Then I rip along the top of each back quarterlight to the first bow (or the
seventh, counting from the front). Same again for bows 6, 5 and 4.
Now the headliner is only held in with bow 3, whcih doesn't hook into the sides like the others, but s held to the roof bracing channel by 7
tangs that go through the beading and bend up. Straighten the tangs and pull forward, and the headlining is out!
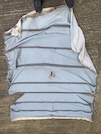 Here it is!. The back is at the bottom of this pic, and the front at the top. This is the top face (against the roof) so you can see the 7
strips that the bows go through. You can also see that it's blue - the bits that have turned over show just how much it has faded inside the car!
 Here's the bare roof inside the car - well not quite beare, it has sound-deadening padding so that it doesn't feel like you're driving in
a drum. On the right, you can see how the trim is fixed above the doors - it's like a grabber rail with lots of wee spikes that point upwards,
so you push the cloth up there and it doesn't come out!
 ANd here's the back...
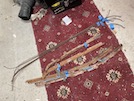 This shows the 7 wire bows, all labelled and numbered along the drivers side so that they can go back exactly where they were. You can also
see the 4 grabber rails. ALl of these need to be sanded and de-rusted so that they slide properly in the new material, and also don't stain
the new lining. I'm also going to seal and paint the roof channels for the same reason.
Then I turn my attention to the bottom windscreen trim. After much faffing around in and out of the car with different spanners, I find one
that fits the wee nut above the dash - 3/8ths is too small and 7/16ths is too big, but somewhere in a box of tools that I rescued from my
dad's shed, I find a 13/32 spanner (that is probably older than I am but in better nick) that fits perfectly. With the nuts off, I get a
block of wood against the cut-out for the wiper, and knock the stainless steel moulding towards the centre of the car. That pulls it out of
the corner moulding and it springs out of the hole that I've just unbolted. Then get a grip of it and pull it outwards and off the car.
That uncovers a screw that lets you get the corner moulding off as well .
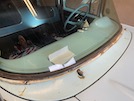 Same on the other side, then I unscrew the slide-on clips and that gets us to here... You can see the wiper escutcheons and the wee hole
that the fiddly bolt goes through.
So that's it for today - that has taken me 3 hours (believe it or not!) but it feels like progress!
Plenty to do before the new headliner arrives!
:: Wednesday, 26 January, 2022 ::
I haven't been doing daily updates, but I have been progressing with various wee jobs over the past 3 days, here at the house.
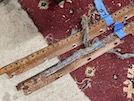 These grabber rails go along the top of the doors. The headlining is tucked up between this rail and the roof, and those wee tangs hold it in
place. Here you can see bits of the old headliner still "grabbed" in place.
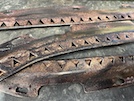 I give them a bit of a wire brush and a coat of Kurust rust converter...
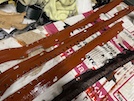 and then two coats of red oxide primer...
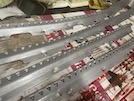 and then a couple of coats of Hammerite smooth silver.
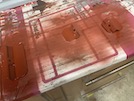 These are the wee clips that hold the windscreen stainless steel moulding in place.
I also rub down all of the headliner bows to remove surface rust so that they will slide through the new headlining more easily, and also
not stain it!
So that's Monday and Tuesday's work, so that brings us to today, and a trip along to the car at the farm, where the first task is to empty
the tank of the dehumidifier again - there's a lot of water, but at least everything inside the car now feels dry!
So let's look at where that water is getting in - I know that there's aa leak at the top of the windscreen, because water drips onto the
dash when it rains, so I'll start there. I pull down the edge of the windscreen rubber seal with a plastic gasket scraper, and slide it
along with one hand, while the other hand holds a gun laying a bead of silicone sealer along the inside.
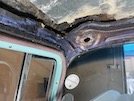 Then I paint Kurust onto all the roof rails, above the windscreen...
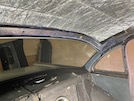 the rear screen...
 and the central rail...
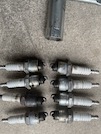 Remember that I said that the car didn't feel like it was running properly when I brought it to the farm? Well, I decide to pull all the
plugs to see if any are fouling up again. Well they are, but only with carbon deposits because the car hasn't had a chance to warm up
properly for ages and has been running on choke all the time. But no oil fouling - head gasket repair a success I think!
I also decide to take off the distributor cap and leads for checking. While I am doing that, the distributor moves - it's not quite tight
enough... Head gasket repair not quite the success I thought it was! I'll have to reset the timing...
:: Saturday, 28 January, 2022 ::
Yesterday I cleaned all of the spark plugs that I brought over from the car, ready to go back in.
I also put bullet connectors on the wires for the dome light, for when I'm ready to reinstall it. I'll need to put the opposite connectors
onto the car wiring.
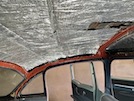 Today I have been priming the roof rails...
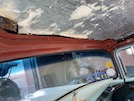 Here's the top of the windscreen...
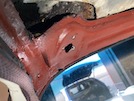 and the top corner of the windscreen pillar.
 the side rails...
 and the central roof brace.
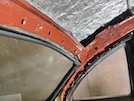 This shows the hoop above the rear window. You can see the wee tangs that the rear of the headlining hooks into.
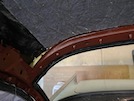 and again here.
This took absolutely ages, along with a lot of contortions to get into all these bits and to be able to see what I was doing!
My intention was to overpaint the red primer, but today was so awkward that I'm almost tempted not to. I'm also concerned about rust
bleeding through the new headliner, although the Kurust should prevent that. All the same, I'm going to persever with at least one
top coat once the primer dries!
With that done, I set the engine to the timing mark (much easier with no plugs in it!) and visually set the distributor so that the
mark that I made before, lines up with the rotor arm. Then I replace the distributor cap and then the spark plugs and leads.
 Thing is, it only just fits through the door, and you can't really put it in at an angle...
 So it ends up more or less in the centre of the garage, where you can't get the other car in or out past it. In fact, you can't get between
the two cars at all - I tried that last time, a few years ago.
 So first I lift the car onto the wheel jacks...
 These new ones have bigger, harder wheels, and ball bearings... so it's pretty easy to push it over to one side of the garage.
 Then I position the Chevy far enough from the wall so that I can open all the doors (to let it dry out) and disconnect the battery because
the interior light won't go off. There's probably a switch somewhere but I couldn't find it. Connect up a trickle charger and take the
jacks out so that they don't distort the tyres, and it's sorted!


